Welcome to DYO Clipart templates!
In this tutorial we’re going to look at how to import your DYO Clipart template into Procreate. If you are using a different drawing app, the process will be similar, but you may need to Google for specifics.
If you know your way around Procreate or other drawing apps, I’ll quickly list the steps you need to take without going into detail. If you are new or need a reminder, I’ve broken down the different steps with screenshots below.
Quick View
- Unzip template folder & transfer your device
- Create new file in your drawing app
- Create new layer for the template
- Import template & resize
- Rename template layer & reduce opacity to 10%
Before You Start
There are a couple of things to decide before you start:
Size
Before you start, decide what size you want to make your clipart. This will depend on how you intend to use the images. For example, if you are creating letter/a4 size printed posters, you will require much bigger images than if you are using the images in small digital resources.
You can, of course, resize the clipart after you have created it. However, if you are going to significantly increase the size of your file, it may risk negatively affecting the quality of the image, so it’s best to work to the largest size you are likely to want.
Outlines
You may also want to think about whether you want outlines around your clipart. You will see in the tutorials I outline all the elements in black. There are two reasons for this. The first is that I know many people want to create blackline images as well as color images. Therefore creating black outlines to start, makes this super easy to do.
Secondly, adding outlines helps to give definition to the images even when seen at small sizes. In future tutorials, we’ll look at adding shading to the characters which adds definition and can remove the need for black outlines.
However, if you are new to digital drawing I suggest keeping it simple and follow along with the blacklines and then change things up a bit later as you desire!
Step One – Unzip the File
You will need to unzip the file in order to use the template. If you don’t know how to unzip a file, this will depend on the device you are working on:
Desktop – If you have downloaded the zip file to your desktop, it should be just a case of double clicking to unzip the file. You will find more detailed instructions HERE. When you have unzipped the files, upload the templates to a cloud service, such as Dropbox, iCloud or Google Drive. Alternatively, if you don’t have a cloud storage service, you can email the files to yourself.
Apple – If you have downloaded the file to an iPad or iPhone, you will find instructions for how to unzip a file HERE. Make a note of where you have saved the files
Android – if you have downloaded the file to an Android device, you will find instructions for how to unzip the file HERE. Make a note of where you have saved your files.
Step 2 – Create a New File In Your Drawing App
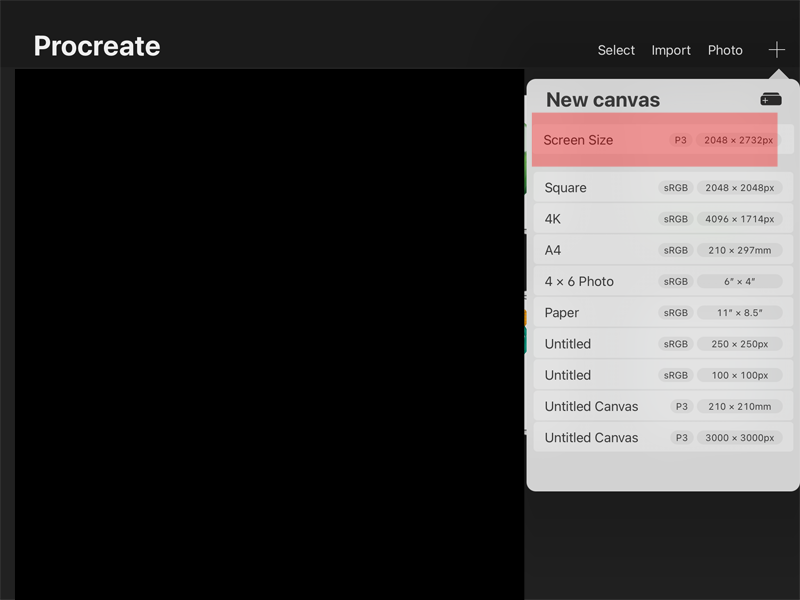
Next, create a new file in your drawing app. The size of the canvas you require will depend on the finished clipart size. I am creating a canvas which is my screen size, as this is one of the defaults in Procreate (and in Sketchbook Pro).
Step 3 – Add a New Layer
When the new file is open, create a new layer. You will find the layer menu icon at the top right of the window in Procreate (in other drawing apps, look for the layer icon).
Step 4 – Import Template File
Now we are going to import the template file. Select the Actions icon (the wrench) at the top right of the page and select ‘Add’. You will now see we have a number of options including Insert File and Insert Photo.
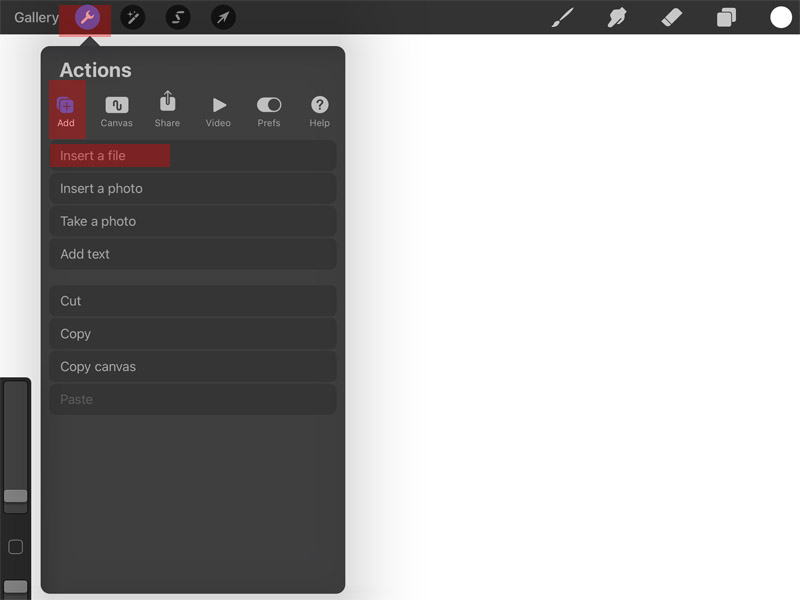
The option you select will depend on where you have saved the templates. If you have saved the templates to your photo roll on your iPad, choose the Insert photo, otherwise choose Insert File.
Select the template you want to insert, tap on the template and you will see it added to your page. Drag on one of the corners to resize the template to your canvas.
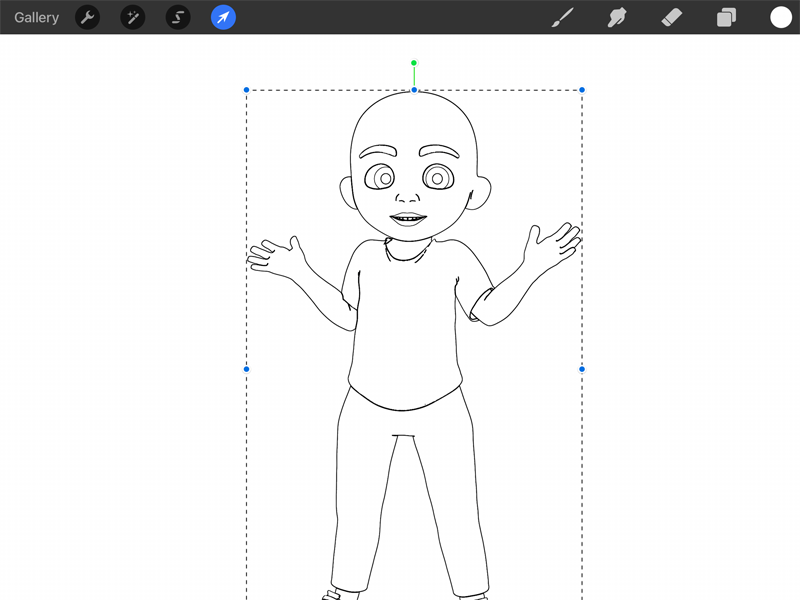
Tip: Don’t resize the the template so the head is right at the top of the canvas as we need to leave room for the hair!
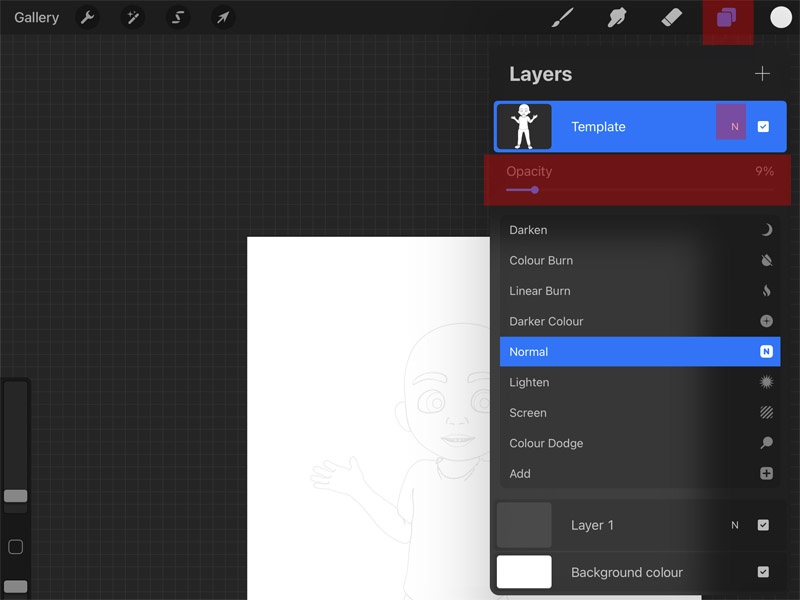
Step 5 – Rename the Template Layer & Reduce the Transparency
Rename the template layer – while this isn’t essential – renaming layer is certainly something that helps with layer management as projects become more complex.
Reduce the transparency of this layer. I reduce it to around 10%. To do this, tap the ‘N’ in the layer panel and reduce the transparency slider.
And that’s it! We’re ready to start tracing in the next tutorial.

