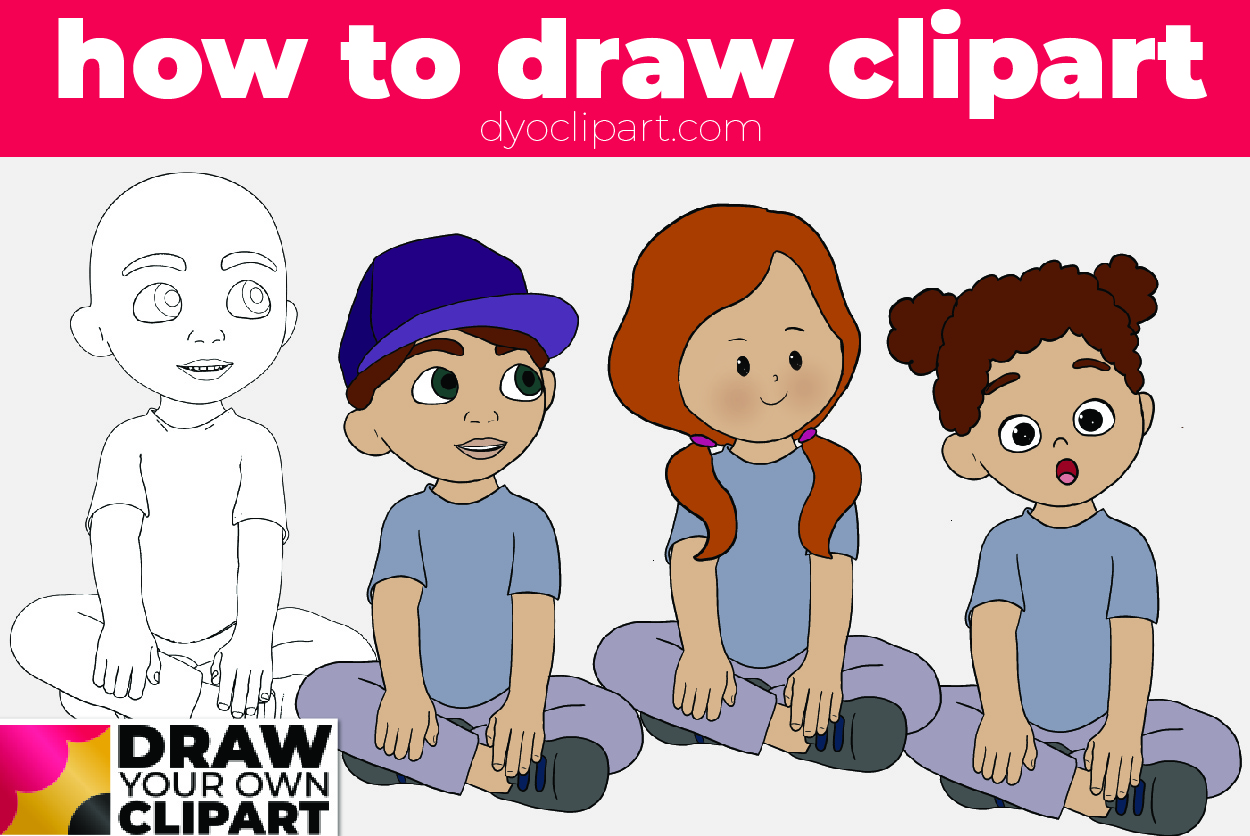
We are going to look at how to use DYO Clipart templates to create pieces of unique clipart.
In this tutorial we’re using the Procreate app for iPads. However, any drawing app for iPad or Android devices will work well. We suggest using apps which use layers. If you want to know more about the drawing apps we recommend, see here – Drawing Apps for Creating Clipart.
Using Layers
The reason why we suggest using layers in the drawing app to create your clipart is that layers give us so much flexibility. If you are not familiar with layers, think of them as several transparency sheets layered over the top of each other. Each layer can be edited, copied, deleted etc without damaging the rest of the image.
So, with our clipart figures, if we put the facial features onto a separate layer to the head, we can easily erase an eye or move the nose, without having to worry about what’s underneath.
This also gives us a quick way to draw hair. We can draw hair on two layers. We can draw the front of the hair onto a layer on top of the face layer, and then draw the back of the hair on the bottom layer.
We’ll cover drawing hair in future tutorials.
Coloring the Clipart
There are many ways to color clipart and how you choose to color yours depends on the finished effect you want to achieve. In this tutorial I am using the flood fill tool (also known as bucket fill). This is a quick way to add solid blocks of color to the images. However, you could also ‘paint’ the characters using different brushes to achieve interesting effects.
In order to use the flood fill option, it’s important that the lines are joined when drawing the outlines. Just a one or two pixel gap can result in the whole canvas being flooded with color rather than just the item you are working on.
In Procreate, to flood fill, just drag the color icon from the top right into the section you want to color. For small areas, just zoom in to make it easier to color.
How to Create Clipart From DYO Clipart templates.
Before we start, decide what size you would like your clipart to be. This will depend on the use you are putting it to. If you are using the clipart in digital products, you are likely to want a smaller size than if you are using it in print. Therefore to be on the safe side, I would anticipate always creating for print (unless you are 100% paper free) and then resizing for digital use if necessary.
I would suggest creating images which are around 1500 pixels tall. This will give you images which are 6″ tall at 300dpi for printing (this is a high resolution print). However, if you want bigger just change the canvas size before starting.
Here’s a quick timelapse video which shows the process I detail below 🙂
Step One
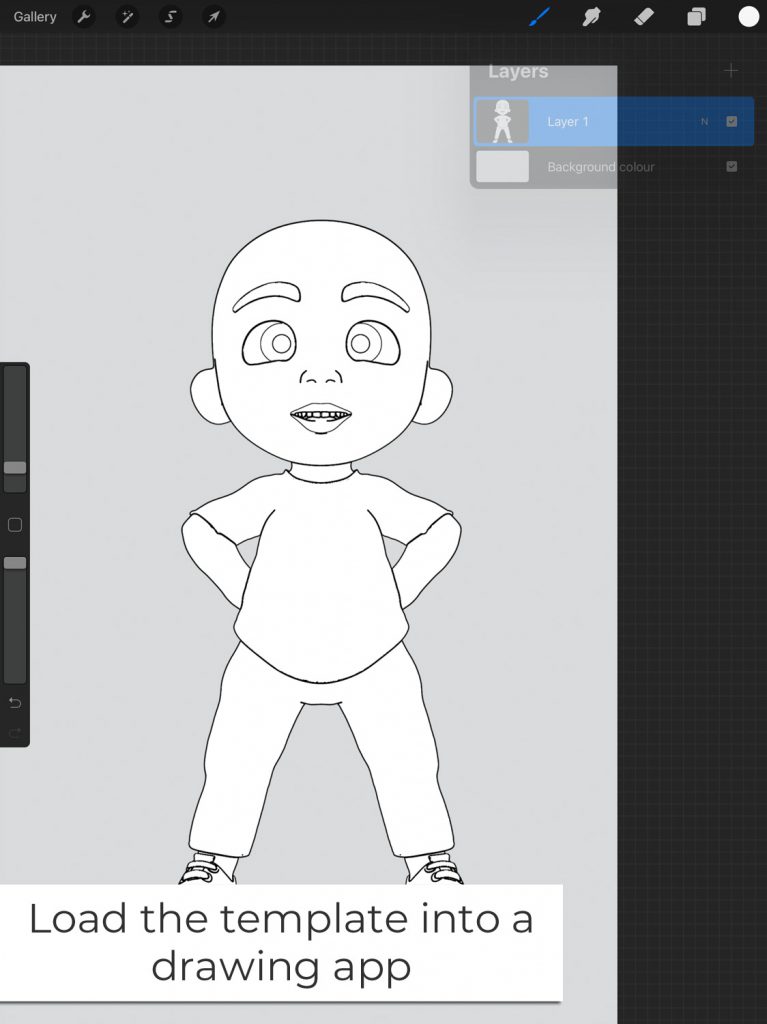
Import the Template
Create a new file/canvas at the size you require. In Procreate, I create a new canvas at 1800 x 1200 and then trim it later.
The first step is to import the template onto the canvas. If you are using Procreate, you can import the image from Files. If you are using another app, import the image into a new document in your preferred manner.
Tip: Change the background color to a light grey or other neutral color to help better see the template and your drawing.
Step Two
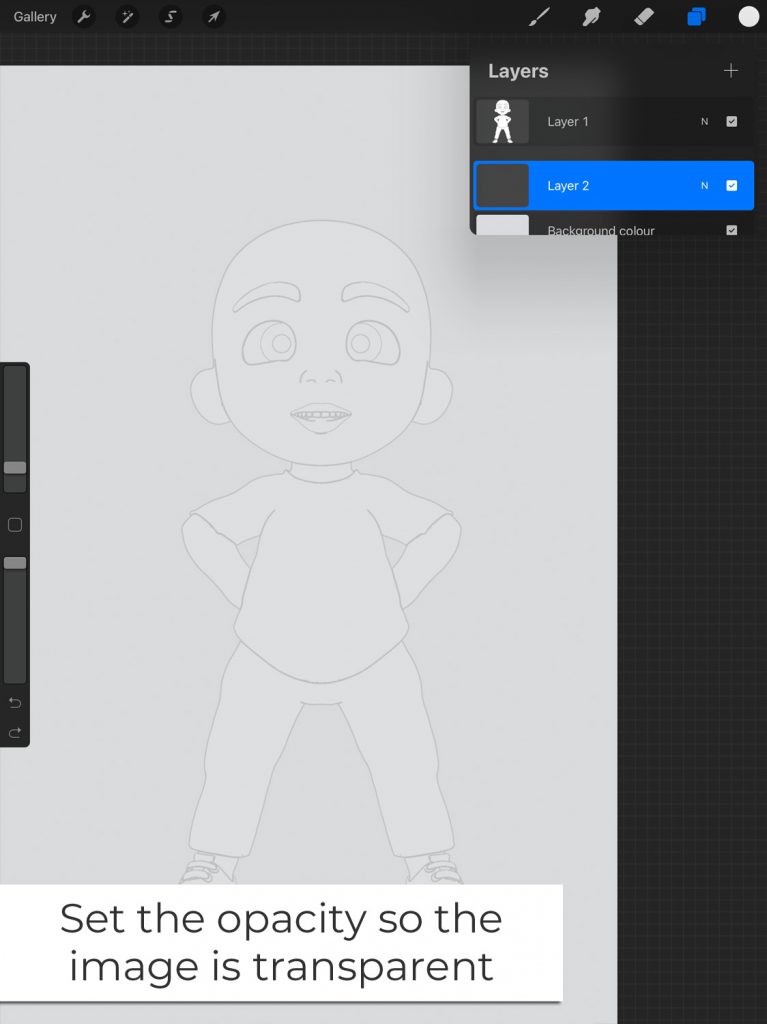
Reduce the Opacity
Reduce the opacity of the template layer so the template is only just visible. I reduce it to 5% opacity.
Create a new layer for your drawing and move this UNDER the template layer.
Tip: It’s also a good idea to lock the template layer – this saves you inadvertently drawing on it instead of another layer.
Step Three

Start Tracing the Image
Start tracing around the template to create your figure. For your first few times with DYO Clipart templates, I recommend following the lines of the template and the figure’s face.
However, when you get more confident, feel free to adapt the clothes (turn the trousers into shorts, or make the t-shirt a long sleeved polo shirt).
IMPORTANT: Make sure the lines meet at the corners so each shape is closed. This will make it super-easy to color the image. This is important if you are looking to create a lot of clipart and need to work quickly.
Step Four
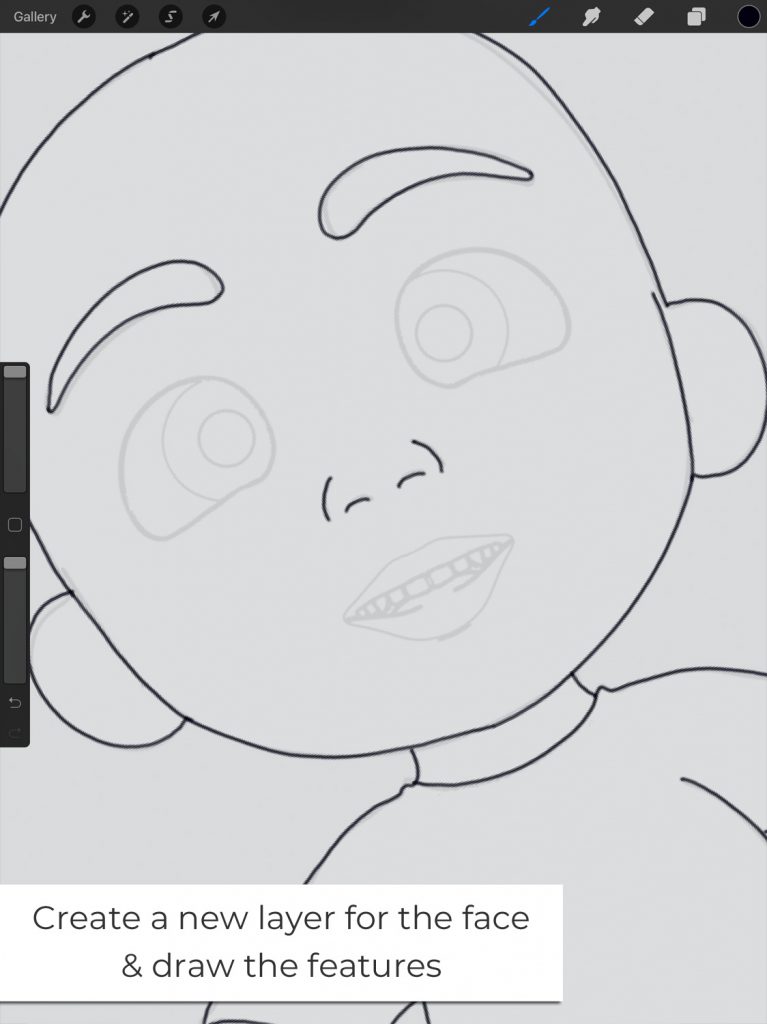
Draw the Face
Create a new layer on top of the body and draw the face. I recommend drawing a new layer as this means you can create different facial features for the same character after you have colored the face. This saves time later if you decide after you have finished the character that you want to change something.
Zoom in to add detail as required.
Step Five
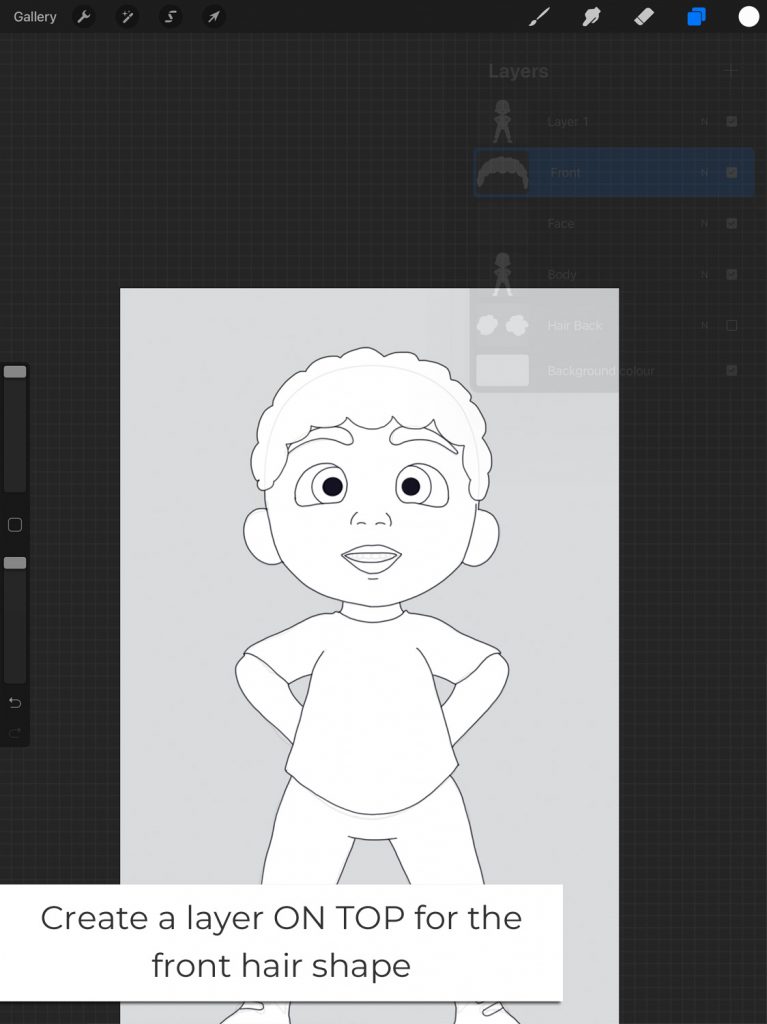
Draw The Hair
Create a new layer on the top for the hair and draw this in a style you prefer. It is best to keep hair styles simple. Draw the hair so it is raised above the outline of the head, as you can see in the image. When you are drawing the hair, it is transparent and you can see the lines below which looks messy. However, don’t worry, once it’s filled with color you won’t see the layers beneath.
Make sure the lines are joined so you have a closed shape and fill it with white or color so you can see what it looks like.
Step 6

Add The Hair at the Back and Color!
Add a layer at the bottom for the back of the hair (if required). This is typically only required if you are planning a hairstyle which goes behind the character’s head, neck or body.
Color the rest of the image and you are done!
Add in details which will help to personalize your character, for example highlights in the eyes, freckles, earrings or any other adornments.
Step 7
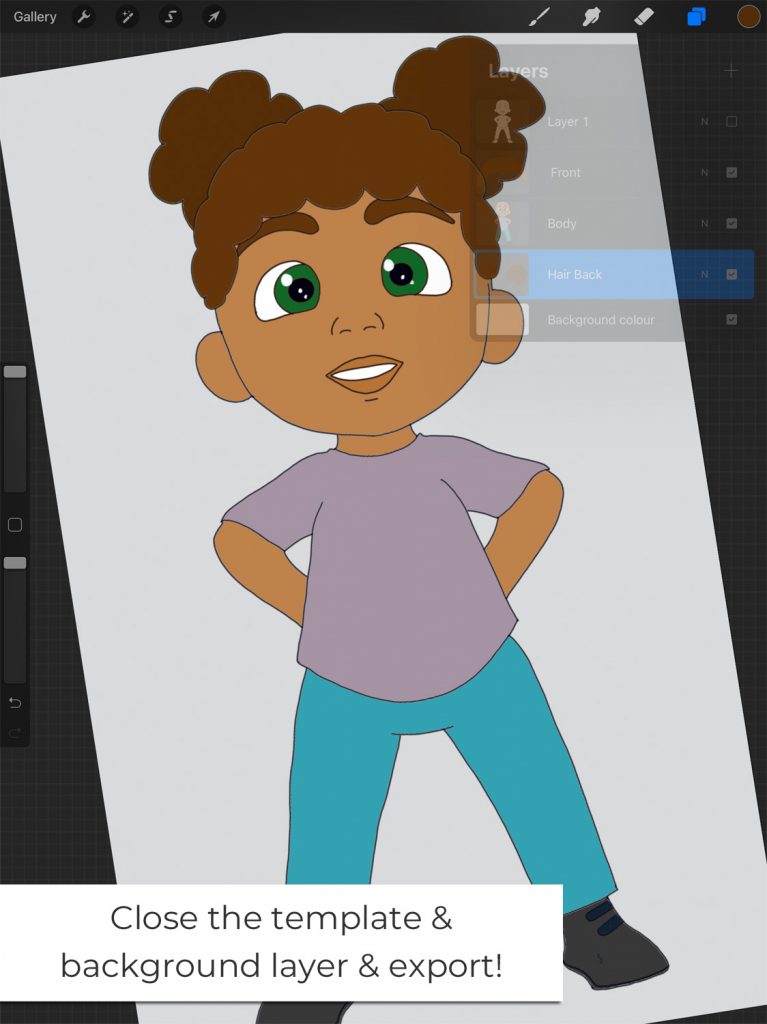
Finish and Save!
When you have finished, remember to close the template layer and close the background layer and then save or export the finished image.
TIP: Remember to save your image as PNG file with a transparent background. This way you can layer your image onto other images without worrying about the white ‘square’ background which appears if we were to save this as a JPG image.
More Tutorials!
Of course, this is a very basic way to get started and there’s lots more we can do. So don’t forget to sign up to our newsletter and be the first to know when new templates and tutorials are added 🙂