If you have made a few clipart characters, you may be looking for ways you can speed up time and also be more flexible with the characters you create.
For more information about drawing faces see here – How to Draw Faces on Clipart
One way to do this is by creating poseable eyes where you can quickly and easily change the iris and pupil direction without having to redraw the eyes each time.
This is also handy if you want to tweak your characters after creating them. For example, if you want to place two students together looking at each other. If you have created poseable eyes, you can quickly adjust the eyes so they are looking at each other without redrawing them.
How To Create Poseable Eyes
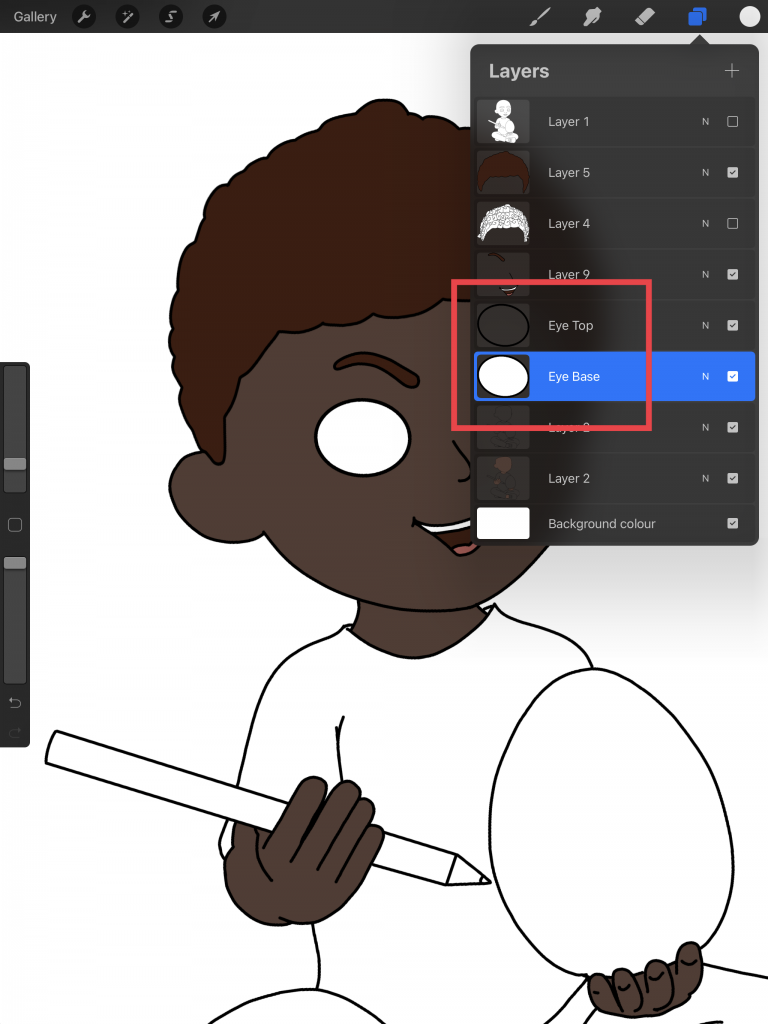
This is very straightforward to do. To do this, we will create the eye over THREE layers
- Top layer – this will be the outline of the eye.
- Middle layer – this will contain the iris an pupil
- Bottom layer – this will eye white.
The way this works is the second layer will be ‘clipped’ to the bottom layer. This means it will only show when it is overlapping the shape in the layer beneath. In our example, this means that the iris and pupil will be only show when it overlaps the eye white. This is perfect for creating characters as you can quickly and easily change the eye direction without having to redraw the eye.
How to Create Posable Eyes
I an doing this in Procreate – however the process will be much the same in any app with layers although the terminology might be slightly different.
Draw and color your base figure. I like to do this first as I find it is helpful when placing the facial features.

Draw the eye shape ON A NEW LAYER
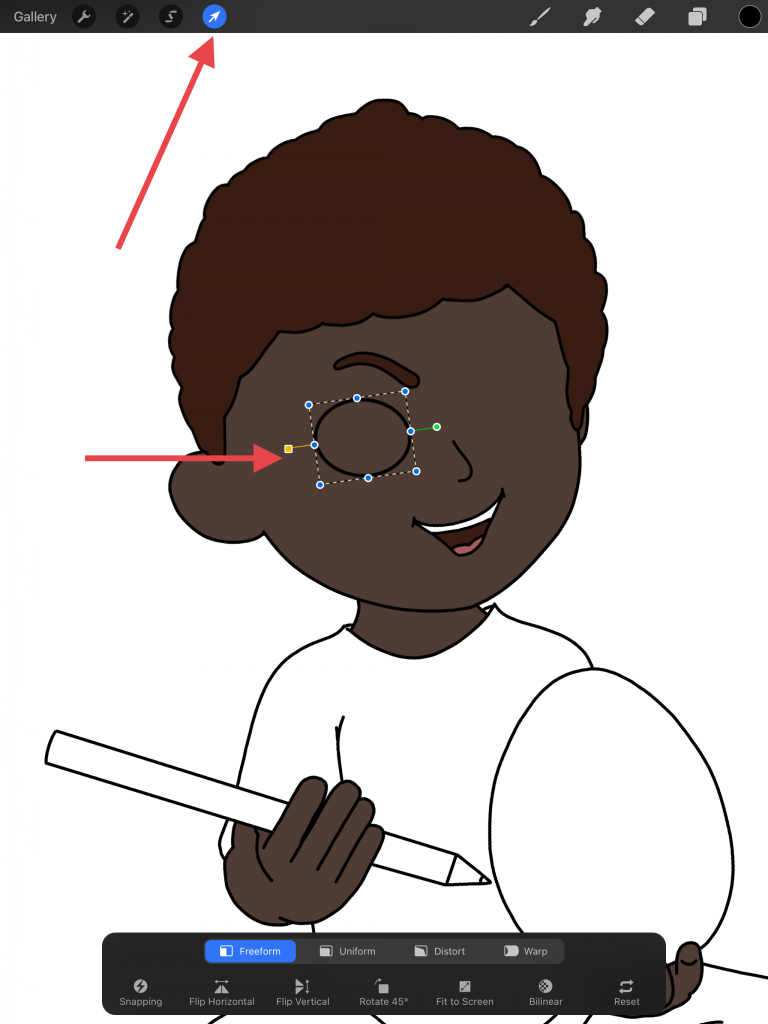
When you are happy with the shape of the eye, use the select tool to select the eye shape and duplicate it (tap the copy and paste icon at the bottom).
Another way to duplicate this is to duplicate the layer – go to the layer panel and swipe the layer to the left and select ‘Duplicate’

Fill the bottom eye layer with white
You may want to rename the layers in the layer panel for clarity.
You will now have two eye layers, the bottom layer which is the eye white and the top layer which is the outline.

Draw the iris and pupil and set the clipping mask
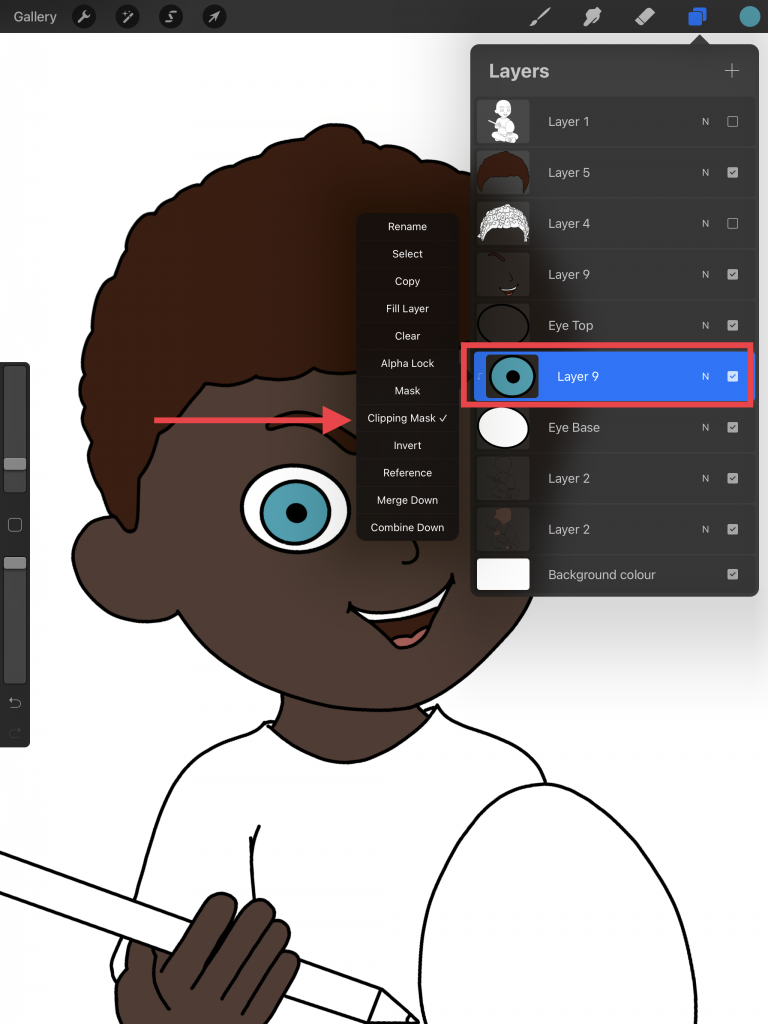
Create a new layer above the eye white and draw the iris and pupil.
Tap on the very far left of the iris layer and select ‘Clipping Mask’ – this clips the image to the shape in the layer beneath it.

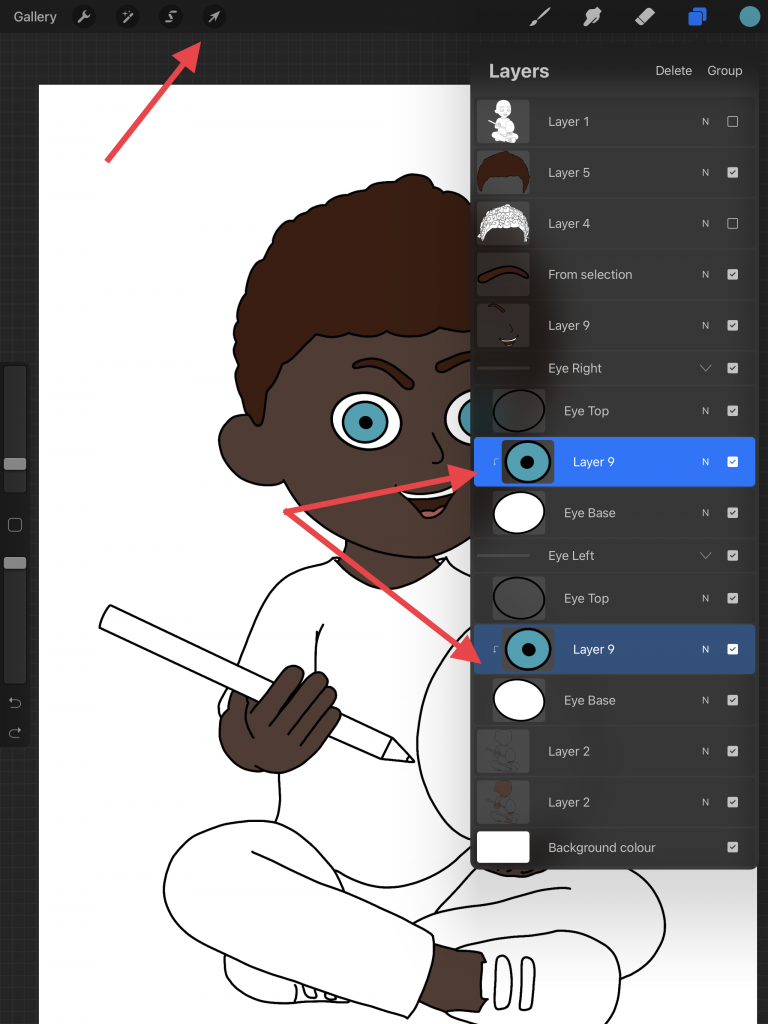
Create a group with the eye layers & duplicate it
To create a group, highlight the layers you want added to the group (in this case the three eye layers) and then click on group at the top of the layer panel.
Duplicate this group by dragging the group layer to the left and choose ‘duplicate’. Highlight the three layers in the new group and drag the new eye into position.
Now select only the middle layer from both groups and choose the select tool (arrow at the top of the page). You will now see we can move the eyes so they are looking in any direction without having to redraw them each time.
Why do we need the top layer?
In case you are wondering why we need the outline layer at the top of each stack of layers for the eye, it’s because when we move the eye so it is overlapping the bottom layer, the iris covers the outline on the bottom layer. It’s not something I personally like, which is why I have the outline layer at the top to keep all the outlines uniform – however try it with the top layer hidden and see what you think.
How to Make This Even Faster
If you want to make this even faster, create the eye in a new document and save this document to use as a base template. Then each time you want to create a document, instead of creating a new document each time, duplicate the one you are using as a template with eye layers already in place.

