Having set the file up ready to create the clipart it’s time to start tracing! In this very first project, I suggest tracing the template exactly as it is shown so you can get familiar with how it works, and then in future tutorials, we’ll look at how to change things up and create more unique characters.
Before we do, let’s take a moment to talk about brushes. You will see that Procreate or your drawing app has a huge variety of brushes. These will give your clipart different looks. The pencil brushes will give a more hand drawn effect while the ink brushes are more uniform.
The choice is up to you and I suggest trying different ones to see which works best for you. I am going to recommend, however, to start you use a standard inking brush such as the Syrup or Fine Tip brush in Procreate. If you are using another drawing app, look for a good basic inking brush without any fancy effects.
What Thickness Lines?
This is a style question and depends on the look you prefer and which works best in your resources. Thicker outlines are more cartoony or comic-book in style. Of course, there’s nothing to stop you from varying the thickness of lines. For example having thicker lines round the outside silhouette of the shape and thinner lines inside.
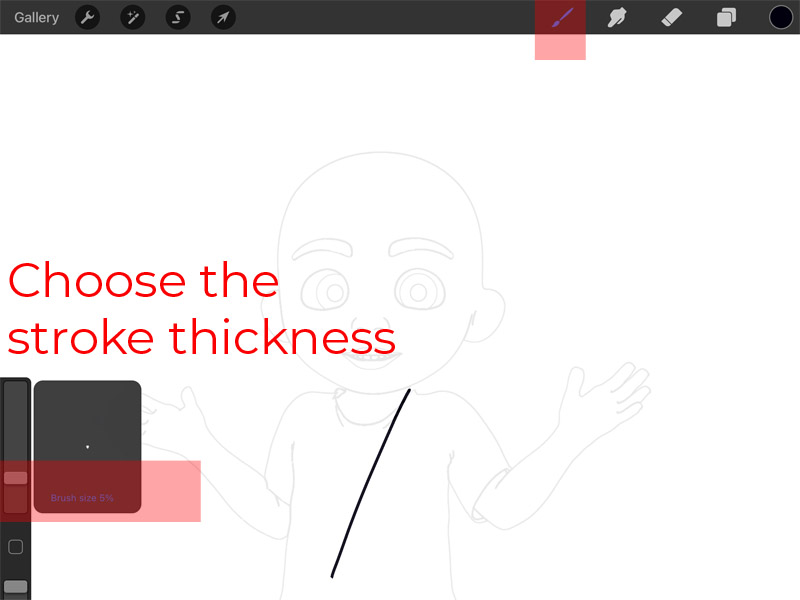
One important thing to remember is if you are creating a blackline version of the clipart to use as a black and white illustration, you will want the lines to be thick enough that the detail shows in smaller sizes.
I am using the Syrup inking brush at 5% size.
IMPORTANT: Always Make Closed Shapes
Before we start tracing and drawing there’s one super-important thing to note. When we get to coloring the image, the quickest way to do this is by ‘flood filling’ (or bucket filling in some apps) – this is where we fill a whole shape with color rather than coloring it as we would with a marker pen.
In order for a shape to be able to be flood filled, it must be completely closed with no spaces or gaps. Even a space of a pixel will mean the shape is open and instead of just coloring that shape, the whole canvas gets filled with color.
Therefore when you are drawing a shape, for example the head, pay attention to how the lines join and make sure there are no gaps for the color to flood out of.
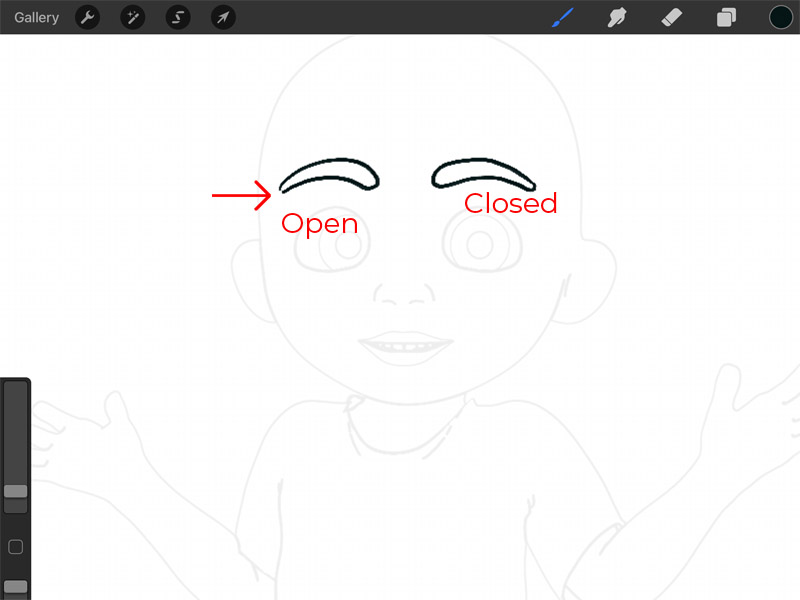
While a gap or two isn’t the end of the world and it’s quick enough to fix, if you are looking to create a lot of clipart, the more efficient your process the quicker you will be.
OK, let’s get started 🙂
Step 1 – Trace the Head
I suggest starting with the head. Make sure you are working on the drawing layer and not the template layer, follow the outline of the head.
Don’t worry if you have a wobble, just ‘undo’ by tapping two fingers on the screen or tapping the undo icon at the bottom left.
You can also erase the wobbles and redraw the erased lines. However, I prefer where possible to redo the whole shape as ‘I’ can always see where I have redone a line (although I’m pretty certain it wouldn’t be apparent when the shape is finished and colored).
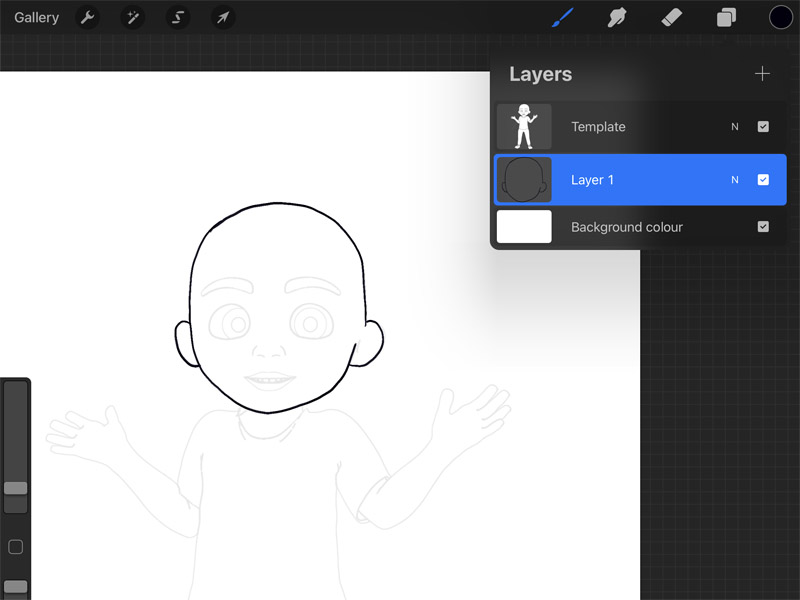
Tip: I start and end at the top of the head, so if the lines don’t perfectly join, it will be hidden under the hair.
Step 2 – Create a New Layer UNDER The Head
Create a new layer under the head. This is for the body. While you don’t need to create the body on a separate layer, I always do so as this means it’s easy to tweak the head size or the angle of the head without affecting the rest of the figure.
It will be handy to rename the layers so you know which you are working on.
Now go ahead and trace the rest of the body on the body layer. Hide the head layer when you are working on the body so it doesn’t confuse things.
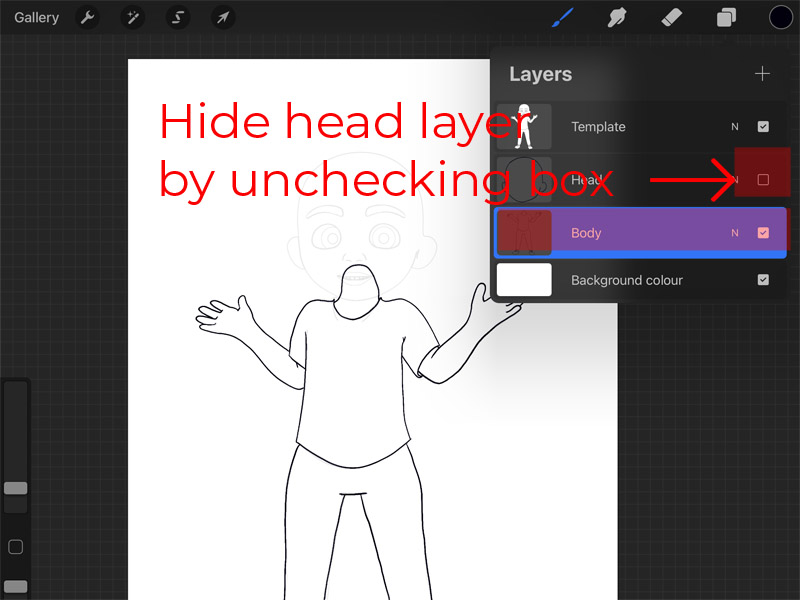
Keep it simple and don’t worry about tracing detail which isn’t going to be relevant for your purpose. Think about how your clipart will be used. If you are creating a full size character for a poster then tracing the rings around the shoe lace might be useful, however if it’s a small image it may just provide a distraction and can be left out.
Note about the neck: Note how in the photo you can see I raised the neck and drew it as a closed shape? This serves two purposes. The first is that it allows me to flood fill the neck with color and the second is that it means we can change the angle of the head without the neck looking funny.
Step 3 Create a new Layer ABOVE The Head for the Face Features
Now create a new layer above the head layer and we’ll use this to draw the face features. Again, the reason why we are using a different layer for the face is so we can change the face features easily if we want to. You may want to unhide the head layer when drawing the features and hide the body layer.
Go ahead and draw the face.
A note about the mouth: I simplify the mouth and do not draw the teeth. However, if I was drawing a close up of a head, I might draw the teeth, but when working at small sizes, drawing the teeth can make the mouth look too cluttered.
A note about the eyes: I always fill the pupil with black, even when creating outlines. This is just a personal thing, however for me this is when the character starts to have personality rather than just being an empty set of lines.
Step 4 – Create Black and White Layers
We are going to create a black and white version and a colored version of our character. There are many ways to do this, however I like to create a new layer for the black and white version and a new layer for the colored version – keeping the outlines we have drawn on a separate layer.
This ensures we always have crisp black lines over the colored and black and white versions.
Go ahead and duplicate the head layer and the body layer (in Procreate, slide the layer tab over to the left to reveal the duplicate option).
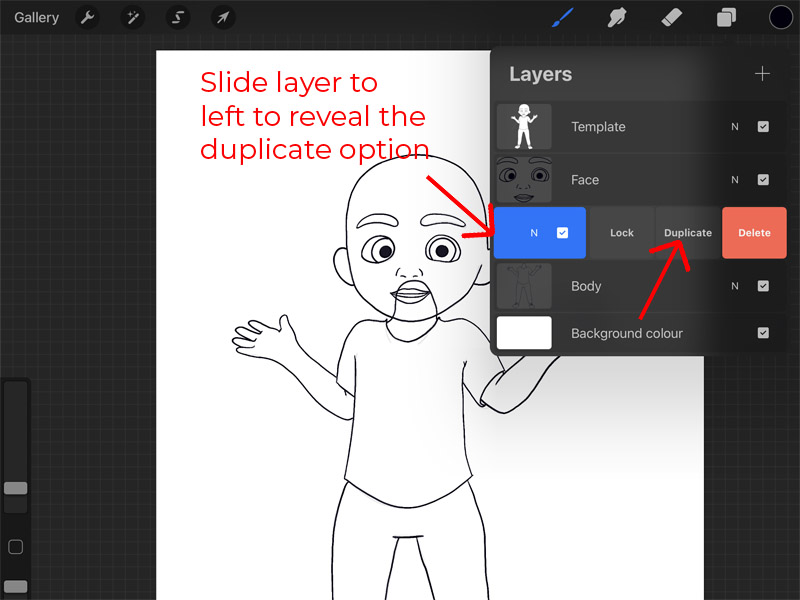
Now go ahead and flood fill the new layers with white. To do this, change the color to white and grab the little color circle in the top right and drag this to the area you want to fill with color. You may need to zoom in to smaller areas to fill with color.
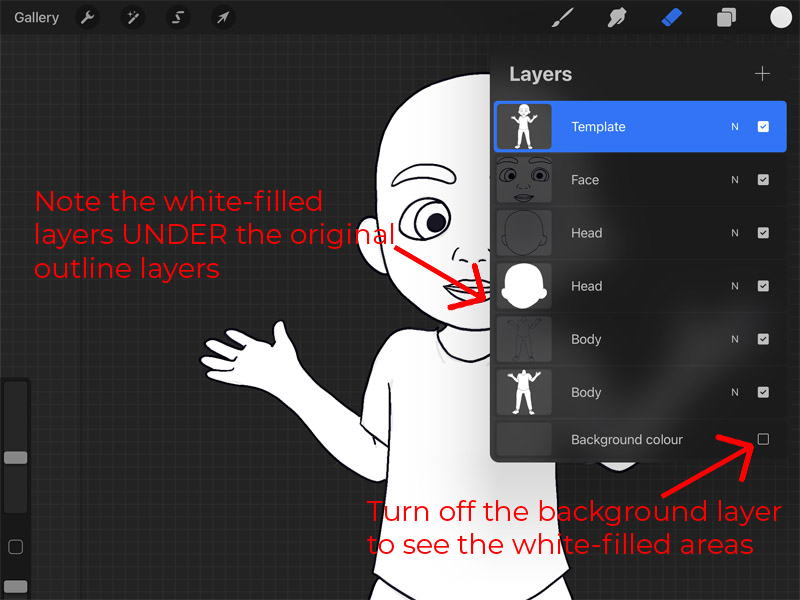
Tip: Turn off or change the color of the background layer so you can accurately see what you have filled with white.
Step 5 – Create The Hair
Create a new layer ABOVE the face features and draw the hair. You can hide or delete the template layer at this stage as we don’t need it any more.
Hair can be as simple or complex as you like. If you are working on a character with long hair, you may need to work on multiple layers, so to keep it simple, let’s create a character with short hair. We’re going to do this freehand!
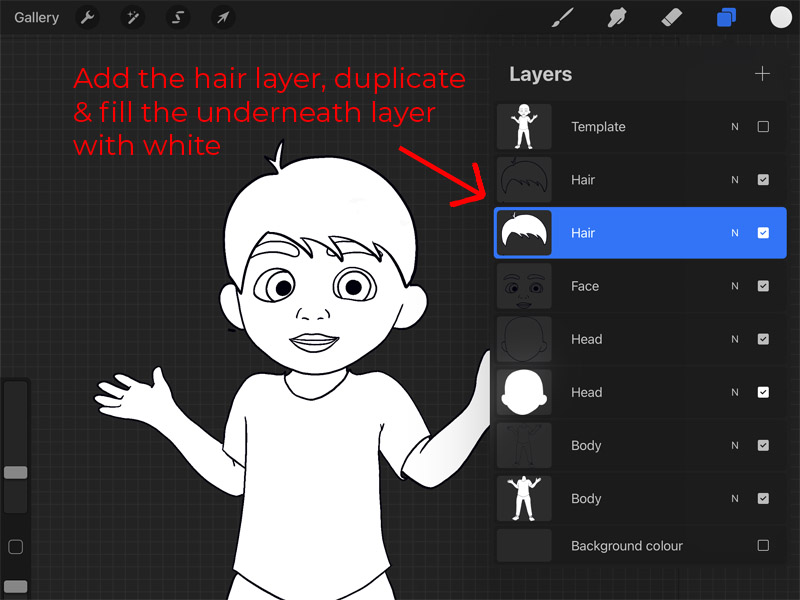
Draw the hair as you like and then do the same as we did above, duplicate the layer and fill the underneath hair layer with white.
How does your character look? We’ll look in later tutorials how to tweak this character further, however, for now, unless there’s anything major you want to change, we’ll move forward to finishing by creating a color layer.
Ready to move on? You’ll find the next tutorial HERE .

